If there was a chore to be loved- cleaning the bathroom would be one of mine. (But rest assured- I don't love it. If I never had to do it again my whole life- I could still die happy.) But using a freshly cleaned shower with fresh towels- Ah!
A couple years ago I read all about "green" cleaning. I read all about it- everywhere. I was trying to get rid of some major allergies in our house, and wanted to make sure I'd covered all my bases. (Not only in the things we ate and the meds we used, but in my cleaning as well)
What I learned in a nut-shell. "green" cleaning can be really cheap or really expensive. Both work about the same.
I'd consider myself a middle of the road "green" cleaner (mainly because I like paper towels:) though I don't use them to clean the bathroom...) My favorite all purpose cleaner (that I especially like to clean the floor with) is Mrs. Meyers. It smells so good! But it's a luxury.
I thought I'd give you a run-down on the bathroom cleaning routine at my house.
1. Put everything away and sweep the floor. (throw towels/bath mats in the wash)
2. Put toilet bowl stuff in the bowl. (I'm currently using Seventh Generation. I've used Target's Method brand. whatever is on sale. Or if I'm really out- distilled vinegar works too. And I know in my head that it works- I just like the heavy duty stuff in the toilet bowl- ya know?)
3. spray shower down with white vinegar (in a spray bottle)
4. Spray counter and toilet with all-purpose cleaner.
5. Sprinkle baking soda around tub and sink faucets.(For extra scrub-factor)
6. Scrub counter- tub- toilet. I use a sponge and a toothbrush for those hard to reach nooks and crannies.(Hint- if you keep up on the bathroom cleaning- there's very little genuine scrubbing involved.)
7. Take a cup and with some water and rinse everything off. (On the counter- guide the water toward the sink. It will go down the drain in the tub. It will go in the toilet and on the floor around the toilet. This is okay because you should have scrubbed that area anyway, and it needs to be cleaned anyway)
8. Get a cleaning towel and wipe of excess water from off the counter, back of the toilet, toilet seat, and floor.
9. Clean the mirror
10. Take a bucket and small cleaning cloth and clean the floor (I use all-purpose cleaner)
11. Hang up new towels
Done.
A very wise woman at my church said to time your chores to see how long they really take (because it's less time than you think). That way, when you are dreading doing them, you can reason with yourself- it will only take ___ to do this. This bathroom routine takes 15 min. tops.
I clean the bathroom once a week. Sometimes the counters and mirror get an extra spray and wipe down mid-week.
I am a cleaning towel user. (It was ingrained in me from childhood- and I like them) We have bath size towels, hand towel size, and wash cloth size. They are all white and from Costco. The advantage to the towels is that you have a lot of surface area for cleaning and they are very absorbent. (Microfiber towels would work, too. But they were not the rage when I got my cleaning towels 6.5 years ago.) We use them for everything- so nice to have around.
All-purpose cleaners: It really depends on your preference. You can make your own or buy some. If I'm buying it- I like to get the concentrated kind and add water. I love the Mrs. Meyers, but it's kind of pricey. I've also used Method and 7th generation. They were fine too.
Kinds I've made: water with Spice of life essential oil; water with Grape Seed Extract and peppermint essential oil. I especially love to give these to my girls when they are helping clean. They smell so good! and even if they sucked on the spray bottle and drank the stuff, it wouldn't hurt them.
You can get a huge jug of distilled white vinegar and a huge bag of baking soda at Costco for really cheap.
And that, ladies and gentleman, is bathroom cleaning 101.
Friday, August 26, 2011
Wednesday, August 24, 2011
Whole Wheat Graham Crackers
Last week we went camping. Julie's only request for the camp out was to have "shmarshmallows." And if you're roasting marshmallows- you have to make s'mores- right? I think it's a rule.
I don't usually buy graham crackers- and I think they're expensive for all they are. And since I found success making sourdough crackers- I thought "I can make graham crackers too! I'm sure it's not hard"
And really, it's not hard. There are more ingredients involved than your plain ol' sourdough cracker, takes a little more time- but its' not hard. You can do this!
I got the recipe from here. (I think her pictures are so pretty! And that's why I will never be an official food blogger :) She also has a gluten free version if that suits your fancy.
My friend tried the said crackers on our camp out and wanted the recipe. So I'll post it now- though I'll have to make it again to make sure it still works and get a picture:)
Oh! and I didn't have graham flour. But from what I found- it's essentially wheat flour ground up a little differently. (Like white flour- and then the outer parts of the wheat ground separately, then all mixed together.) So I just used wheat flour instead of graham flour-
Whole Wheat Graham Crackers
From Deliciously Organic
1 1/2 cups graham flour
1/ 2 cup whole wheat flour
5 Tablespoons sucanat or brown sugar
2 teaspoons maple syrup
3/4 teaspoon aluminum-free baking powder
1/2 teaspoon baking soda
1/2 teaspoon coarse sea salt
1/8 teaspoon ground cinnamon
6 Tablespoons cold unsalted butter, cut into 1/4-inch cubes
1/ 4 cup plus 2 teaspoons molasses
3 tablespoons whole milk
1/2 teaspoon vanilla extract
Place graham flour, whole wheat flour, whole cane sugar, maple syrup, baking powder, baking soda, salt and cinnamon into the bowl of a food processor and pulse 4 times to combine.
Add the butter and pulse 7 times until the mixture resembles cornmeal.
Add the molasses, milk and vanilla extract to the dough and process until the dough forms a ball, about 1 minute.
Pour the dough out onto a large piece of plastic wrap, and flatten the dough into a 1/2-inch thick disk. Wrap in plastic wrap, and refrigerate for 30 minutes.
Preheat the oven to 350° F and adjust rack to middle position. Unwrap the chilled dough and place it onto a greased pan (or on a silpat mat). Place a piece of parchment paper on top (or I used the plastic wrap it was chilled in...)
Using a rolling pin, roll the dough out on the pan until it is 1/8-inch thick. Remove the top sheet of parchment paper and cut the dough, using a knife or rolling pizza cutter into 2-inch square pieces. Using a fork, poke holes on the top of the dough. Place baking pan with dough in the oven and bake for 25 minutes or until the edges just start to darken. Remove from the oven and cool completely. (I re-cut after it came out of the oven because I didn’t want broken crackers later…) Once completely cool, break into individual crackers. Store in an airtight container. The crackers will keep for 1 week.
Sourdough Crackers
I'll be honest- I think making crackers sounds weird. It sounds hard. It sounds like- "That wacky lady over there makes her own crackers!"
So I'm slightly hesitant to tell people I make crackers. But guys- these are crazy easy and so good! Kids or not- we all want a good cracker once in a while.

So I'm slightly hesitant to tell people I make crackers. But guys- these are crazy easy and so good! Kids or not- we all want a good cracker once in a while.

Ingredients:
1 cup “discarded” sourdough starter
1/4 cup room temperature coconut oil (or butter- or I’m sure olive oil would work too.)
1 cup whole wheat or spelt flour, or as much as you need to make a stiff dough
1/2 tsp sea salt
Olive oil for brushing
Coarse salt (such as kosher salt) for sprinkling on top (or you could use garlic salt, Italian seasoning, etc.)
In a large bowl, combine the sourdough starter, oil, flour and salt. It should make a firm but pliable dough. Cover the dough with plastic wrap and leave the dough at room temperature for at least seven hours. (I usually mix it up at night and let it sit out overnight- the longer it sits- the more sour it gets.)
7 + hours later, preheat the oven to 350 degrees.
Spray the bottom of your baking sheet with oil, (Or use a silpat or other nonstick baking mat). Use a rolling pin and roll the dough onto the cookie sheet until it is very thin. (Level of thickness= your preference. I usually use 1.5 cookie sheets to roll out a batch.) *I've used a stone bar pan and a regular baking sheets sans the baking mat and I can't tell the difference. Don't tell anyone I just said that.
Pour or spray a little bit of olive oil on the rolled out dough and spread it to the edges of the dough with your hand (or a pastry brush if it suits you…). Sprinkle with coarse salt.
Cut the dough in whatever shape you want your crackers. Bake for 15-20 minutes or until just golden brown.
I like to cook the crackers for 15 min- then turn off my oven and leave them there to cool. It makes them extra crispy (without being burned:)
Freezing: This dough also freezes very well. After it has soaked for 7+ hours, place it in a baggie in the freezer. When you are ready for crackers- let the dough thaw on the counter for 1-2 hours- then roll it out and cook.
The Veggie Sandwich
This is more of a "method meal" meaning- there's not really a recipe, but an idea and you can adapt it how ever you like.
This idea comes from my sister, Diana. Because of her occupation, she goes out to lunch a lot. She told me how she started ordering Veggie Sandwiches everywhere she went so she could decide what she really liked. This is the way I like it:

Veggie Sandwich
*Good bread- (Key ingredient! "Only okay" bread and you have an "only okay" sandwich.)- I like it toasted.
*Avocado- spread on the sides
*sliced tomato
*sliced cucumber
*lettuce
*salt and pepper
Diana likes spreading cream cheese on one side. I think she usually adds cheese too. My cheese addition depends on my mood. One time we were in a hurry and we had these for dinner. Alan asked if we could add bacon to our veggie sandwich. Yes- it was no longer a veggie sandwich- but it was good too! The point is- add what you want/like.
My girls will gobble these up. And it's a total treat when garden tomatoes are in abundance.

Wednesday, August 17, 2011
Quinoa Black Bean Burger
Despite what you might think, I try and use pretty common ingredients in my cooking. (And now you're thinking- "Kefir? Whey? Kammut? I can't believe you just said that!" I know.) What I mean is- if it resides in my cupboard- it needs to be used frequently. None of this buying a special ingredient for one recipe and then letting it sit for a year.
Quinoa is a grain. If you are not familiar with it- in very general terms it's like rice. (You boil it like rice- you could interchange it with rice...) It is gluten free and has a fair amount of protein. It's pretty awesome. I use it a lot- therefore- I don't think it's weird.
And the following recipe calls for coriander. I don't have that on hand- so I leave it out- or use cilantro if I have it. (Coriander is the fruit of the plant (seed) cilantro is the leaves of said plant.)
And now I present to you:
The Quinoa Black Bean Burger.

FYI: if you make this expecting it to taste just like a hamburger- you will be disappointed. It's really good all of it's own accord- but it's not a beefy burger. Although they look similar- they are different. Each good in their own right.
Quinoa Black Bean Burger
Ingredients
- 2 Cups Quinoa
- Sea salt & cayenne
- 1 Tbsp. paprika (smoked is best to get that “meaty” flavor)
- 1 Tbsp. cumin
- 1 Tbsp. coriander (I use cilantro if I have it)
- *just a dash* cinnamon (secret ingredient)
- 1 Cup chopped pecans (I’ve used walnuts too, if I’m out of pecans)
- 1 Cup organic ketchup
- 1 15 oz.Can black beans (rinsed)
- 1/2 Cup panko breadcrumbs (I’ll just stick a piece of bread in the food processor and make my own bread crumbs…)
1A. (optional step) Put quinoa in pot with 2 cups water and 2 T acidic medium (kefir, lemon juice, whey…) Soak for 8-24 hours. Then add 2 more cups of water, bring to a boil- and then reduce heat, cover, and simmer until liquid is absorbed (about 20 min.)
1B. (If you didn’t do 1A) Bring to boil 4 cups of water. Add 2 c. Quinoa. Reduce heat, cover, and simmer until liquid is absorbed.
The next steps depend on the size of your food processor. A blender would work too. Basically, you blend up the rest of the ingredients and then mix it together in a bowl.
My food processor requires multiple blending batches. I blend up ½ of cooked quinoa with ketchup, blend it- bowl it. Rest of quinoa and spices- kind of blend- bowl it. Nuts- blend- bowl. Beans- blend- Bowl. Slice of bread- blend- bowl. That sound kind of hard- but it’s not. I don’t wash the food processor bowl in-between blends. It takes maybe 5 min. to do it all.
Then form patties and cook it on skillet on med-high about 4 min. on each side.
(Or you could cook in a 400 degree oven for 12 min- flipping half way through.)
Makes 12-16 patties (depending on size)
Serve on a bun like a burger or all by itself with some veggies. Every member of our household likes these.
Friday, August 12, 2011
Black Beans and Rice
This recipe is so easy, it kills me. Really, I would never guess it's a 3 ingredient wonder (maybe 5 if you count salt and pepper). You can eat it alone, we'll have it as a "main" dish with some kind of veggie on the side. Add it to your eggs in the morning with some salsa- it is so versatile and SO GOOD!
If I know we're going to have a quick dinner night- I'll cook up a pot of brown rice to have at the ready- that makes this come together so fast!
Recipe from here.
Black Beans and Rice
2 cups of cooked brown rice (warm or room temperature)
1 15 oz. can black beans- rinsed and drained
1 T. coconut oil
salt and pepper to taste
Mix it all together and enjoy!
Popcorn
Here's a recipe if you need it, but this is really more of a method -type snack
Popcorn. It's whole grain, crunchy, and so good! We love it at our house.
Here's our favorite way to fix it:
Put 1/2 cup of kernels in the air-popper.
Pop it.
Drizzle 1 T. coconut oil, lightly salt, mix, and dig in!
Here's my #1 Snitcher on her snitching perch.

Whole-Grain Sourdough Waffles
I was so excited to try these out. They are so easy and so good!
(If you're like "Sourdough? I'm so lost- click here)
I do not have a fancy-shmancy waffle maker. It's 1 of 5 that I got from my wedding. (And no, I don't have the other 4 still:) So maybe I'm not a picky waffle person- but we still think these are good.
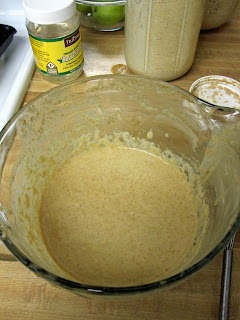
Here's a little visual if it suits you. This is the batter minus the baking soda.


(If you're like "Sourdough? I'm so lost- click here)
I do not have a fancy-shmancy waffle maker. It's 1 of 5 that I got from my wedding. (And no, I don't have the other 4 still:) So maybe I'm not a picky waffle person- but we still think these are good.
Here's a little visual if it suits you. This is the batter minus the baking soda.

Then you add in the baking soda- whisk, whisk, and wholah! Bubbles.

And here's the stack. More often than not, I double the recipe and freeze some for later. Cook once- eat twice. That's what I always say. (Not really- but I should. Maybe that will be my new motto!) You can reheat in the toaster- just like an ego waffle. But WAY better.

Whole Grain Sourdough Waffles
recipe from here
- 2 cups sourdough starter (Fed the night before so it’s ready to go in the morning)
- 1/2 teaspoon sea salt
- 2 tablespoons sweetener (maple syrup, honey, your choice of grainy natural sugar…)
- 1/4 cup melted butter or coconut oil
- 2 eggs
- 1 teaspoon baking soda mixed in a little cup with 1 tablespoon water
- 2 Tablespoons of ground flax (optional)
- ½ tsp. of vanilla (optional)
- Dash of cinnamon (optional)
1. Plug in your waffle iron so it will be hot and ready to go when you’re done mixing the batter.
2. In a mixing bowl, combine 1/4 cup melted butter or coconut oil (not too hot), 1/2 teaspoon salt, 2 eggs, 2 tablespoons sweetener (you could leave this out if you want), and your flax, vanilla, and cinnamon (if you choose these options). Whisk it about until the batter is nicely combined.
3. Add your starter to the mix. Cut it in and stir it with the whisk until incorporated.
4. In a little cup combine 1 teaspoon baking soda and 1 tablespoon water. Stir it up a bit and then pour it on top of your batter. Do a few quick whisks- you want to incorporate the baking soda quickly. The batter will get pillow-y and bubbly. (Remove the whisk from the batter and toss in the sink)
5. Cook on your hot waffle iron- top to your liking, and enjoy!
Sourdough
Alan, "I'm so glad you discovered Sourdough because it's really good!"
Seriously- he said that. Unprompted.
And it's true!
Sourdough is my newest kitchen pet that I've had the last several months. (I call it a pet because you have to feed it and water it so you don't kill it. It's alive! It's my pet:)
I had thought about sourdough for a long time, but was super intimidated by it. I'm not sure why- especially after having used it the last several months- it really is easy. Here's a good post debunking all your sourdough misconceptions.
When I mention to people I've been using sourdough- they ask if I make bread with it. No (and yes). Bread was the last thing I made with my starter- mainly to try it out and since everyone kept asking if I made bread with it. The bread is good and fine (but my bread heart belongs here) but there are so many other things to make with sourdough. Pizza dough, waffles, pancakes, tortillas, crackers, English muffins, cake, cup cakes, banana bread- so.many.options. That's why I love it and use it.
Grace had a hard time understanding sourdough at first. She would ask things like, "Mom, can you make sourdough salad?" Um- no. So here's what I told her in a nutshell. Sourdough is more of a grain.When the grain grows on the plants, it has stuff on it to naturally preserve it (phytates). Like how we store wheat- it will last a long time. It's a good thing! But when we put that in your body- your body doesn't quite know what to do with it. It could make your tummy hurt and you can't get the vitamins in your food (the phytates bind up the vitamins and minerals in your food so your body can't absorb them) So we have to prepare the grains properly so our body can use all the good things in the grains. That's what sourdough does- prepares the grains properly. (Soaking or sprouting does this too) Did she get it? I don't know. But Alan did:)
I saw this sourdough e course that looks good and I considered signing up for it- but when push came to shove, I decided to use my vast expendable income in another way. So if you end up taking it- let me know how it is!
I ordered the Alaskan Sourdough starter from Cultures for health. (Actually, I think I ordered the same thing off Amazon to get free shipping...) It took about a week to feed it and have it alive and well. I feed it wheat or spelt flour.
If sourdough is something you are interested in and you live by me- I'll give you 1/2 c. of starter and directions for $4. (I know- so expensive. Covers my cost to feed it and also covers the psychological side of "I paid for this so I better take care of it." I think if you are monetarily invested you more likely to succeed:) You can find tons of recipes online.
Be brave and give sourdough a try!
Monday, August 8, 2011
Oatmeal Kefir Pancakes
I love breakfast- cooking it and eating it! I have made many a pancake over the years- and I like a lot of them. These ones- though- They're really good!
I do have to tell you that while I love cooking breakfast- it does take time. So I usually mix up a double batch of these, then stick 1/2 in the freezer and 1/2 in the fridge. (1 single batch of these is good for 2 breakfasts at my house of 2 adults and 2.5 kids- Kyle eats for .5 of a kid now:) That way if we have a quick morning and we need some fast food- we've got it.
My favorite pancake topping is applesauce with fresh fruit. Sometimes we'll have butter with a little (real) maple syrup. They are even good plain, which I think is the mark of a really good pancake.
Here's the flour, oats, and kefir the night before.


Oatmeal Kefir Pancakes
source:www.trainermomma.com
2 cups rolled oats
1 cup whole grain flour (I love Kammut with these- but wheat or spelt is great too.)
1/2 teaspoon baking soda
2 teaspoons baking powder
1 teaspoon salt
2 tablespoons honey
2 cups dairy kefir (or buttermilk)
2 large eggs
3 tablespoons coconut oil
1 teaspoon vanilla extract
12-24 hrs. before (or the night before):mix together the flour, oatmeal, and dairy kefir. Cover and let sit on the counter until morning.
In the morning: Add in everything else and mix together until blended. Spoon 1/4 cup of batter onto hot griddle. (I heat mine at medium heat) Flip pancakes when top gets bubbly (around 1 minute).
Makes 16 pancakes
*I updated my bread recipe with a couple pictures. Don't get too excited:)
I do have to tell you that while I love cooking breakfast- it does take time. So I usually mix up a double batch of these, then stick 1/2 in the freezer and 1/2 in the fridge. (1 single batch of these is good for 2 breakfasts at my house of 2 adults and 2.5 kids- Kyle eats for .5 of a kid now:) That way if we have a quick morning and we need some fast food- we've got it.
My favorite pancake topping is applesauce with fresh fruit. Sometimes we'll have butter with a little (real) maple syrup. They are even good plain, which I think is the mark of a really good pancake.
Here's the flour, oats, and kefir the night before.

The first batch

The stack. Just beautiful.

Oatmeal Kefir Pancakes
source:www.trainermomma.com
2 cups rolled oats
1 cup whole grain flour (I love Kammut with these- but wheat or spelt is great too.)
1/2 teaspoon baking soda
2 teaspoons baking powder
1 teaspoon salt
2 tablespoons honey
2 cups dairy kefir (or buttermilk)
2 large eggs
3 tablespoons coconut oil
1 teaspoon vanilla extract
12-24 hrs. before (or the night before):mix together the flour, oatmeal, and dairy kefir. Cover and let sit on the counter until morning.
In the morning: Add in everything else and mix together until blended. Spoon 1/4 cup of batter onto hot griddle. (I heat mine at medium heat) Flip pancakes when top gets bubbly (around 1 minute).
Makes 16 pancakes
*I updated my bread recipe with a couple pictures. Don't get too excited:)
Friday, August 5, 2011
Whole Grain Bread- soaked if it suits you
It's official, I have become a bread snob. My mom made bread while I was growing up, and while I appreciated her efforts then, I didn't quite realize how good I had it. I've made bread throughout my married life (using her recipe) and it's really good. This recipe has a few tweaks to hers, and I'm in love. I could eat it every day the rest of my life, and die happy. Seriously.
I will say that if you are serious about making bread- you need a Bosch Mixer. It will make your life so much easier. With you and your Bosch- the sky's the limit.
Couple things before you start- You might read about soaking your grains and quit right there. But before you decide to do that- let me tell you that soaking is really very easy. You just have to time it right. I usually mix up my dough the night before (while I'm cleaning up the dinner dishes), then add the salt, gluten and yeast in the morning- rise and bake. Or you could mix the dough in the morning, soak during the day, and rise and bake at night...Yes, soaking takes more time, but it's not like you have to stand over your dough while it soaks for 12 hours.
Here's the flour, oats, flax, millet, honey, oil, water and kefir all mixed up and ready to soak.

The next morning, I take 1/2 c. water, add the yeast and a squirt of honey, make sure it's alive and well while I add the salt and gluten to my soaking grains. Then I throw the yeast in an knead away.

I usually just spritz some olive oil on my counter and form my loaves on that- it doesn't stick and it's a much easier clean up than flour.
*The double rise- I have to tell you that I don't usually do this. I only do a double rise if it's more convenient for me time wise. Ex. Saturday I mixed up a batch. By the time it was almost fully risen (the first time) and ready to bake- we were headed out to go swimming.I didn't want to make everyone wait while it baked 35 min. So I didn't bake it and just left. We went swimming and when we came home, I punched it down, gave it a second rise and then baked. I honestly don't notice a real difference either way.
And here's another helpful hint if you are going to be freezing your bread- slice it first. That way if you are in a pinch and need some bread for a PB&J stat, but all your bread is frozen, you can break off a slice and pop it in the toaster. Other wise you'll have a brick of a loaf that you can't cut until it thaws. Not that I've ever been in a pinch like that...

*Adapted from here
Homemade Whole Grain Soaked Bread
11 cups of ground whole wheat flour
1 cup acid medium (kefir, cultured buttermilk, or whey; for dairy intolerant you can substitute with 1/4 cup apple cider vinegar or lemon juice and 3/4 cup water)
3 cups of warm filtered water
2 cups oats
1 cup honey
3/4 cup coconut oil, or butter melted
1/4 cup raw millet, optional
1/4 cup flax seed, optional
3 cups of warm filtered water
2 cups oats
1 cup honey
3/4 cup coconut oil, or butter melted
1/4 cup raw millet, optional
1/4 cup flax seed, optional
1/2 cup water
1 tsp honey
3 Tbsp active dry yeast
2 Tbsp sea salt
¼ cup vital wheat gluten
1 cup flour (sprouted if you have it), if necessary
Directions:
- Combine the flour, acid medium, oats, honey, melted oil, millet and flax seeds, and 3 cups of filtered water. Cover and soak at room temperature for 12-24 hours.
- After soaking, in a separate small bowl, combine yeast, 1 tsp of honey, and 1/2 cup warm filtered water. Let sit for 5 minutes or so, until fully proofed.
- Combine the yeast mixture, soaked flour mixture, and all the rest of the ingredients in your mixer. You may need to add an additional 1-2 cups of flour. Dough should clean the sides of the mixer.
- Knead the dough for 10 minutes until the gluten is fully developed. (I really only do about 3-5)
- Remove to a greased bowl and cover with a towel. Let sit until doubled, about 1 1/2 hours. (I also usually skip this step)
- Punch down, turn dough over, and allow to rise until doubled again, about 45 minutes. (OPTIONAL, but preferred for best results)
- Punch down dough and divide into 4 loaves. Roll out with a rolling pin into a rectangle and roll up into a loaf (this makes the perfectly shaped loaves). (I don’t use a rolling pin, just form and put in pan.)
- Place in greased bread bans and rise again until doubled, about 30-45 minutes
- Turn the oven on to 350 degrees and bake for 30-45 minutes. Bread is done when it is fully browned on all sides! Remove from oven, rest in pans for 10 minutes before removing from pans.
Yield: 4 loaves.
If you do not desire to soak your flour, follow these instructions:
You have the option of replacing the 1 cup acid medium with water in the recipe above, so you have a total of 4 1/2 cups of water, or you can use the acid medium and just skip the soaking and proceed as described here.
- Combine yeast, 1 tsp of honey, and 1/2 cup of the total water required. Let sit for 5 minutes or so, until fully proofed.
- Combine the yeast mixture, remaining 4 cups of water (or 1 cup acid medium & 3 cups water), and all the rest of the ingredients in your mixer. Only add as much flour until it cleans the sides of the bowl.
- Knead the dough for 10 minutes until the gluten is fully developed.
- Remove to a greased bowl and cover with a towel. Let sit until doubled, about 1 1/2 hours.
- Punch down and divide into 4 loaves. Roll out with a rolling pin into a rectangle and roll up into a loaf (this makes the perfectly shaped loaves).
- Place in greased bread bans and rise again until doubled, about 30-45 minutes minutes (the best place is the oven! Just turn it on low 150-170 degrees till heated and then turn it off, prior to putting the loaves in).
- Turn the oven on to 350 degrees and bake for 30-45 minutes. Bread is done when it is fully browned on all sides! Remove from oven, rest in pans for 10 minutes before removing from pans.
About
My sister was telling me the other day how she feels like a walking infomercial sometimes. I could totally relate.
You see- for me to give something my stamp of approval, I have to really like it. Really like it. And then- if I like something that much, I want to tell people about it- because I think it's so great and I want you to know about it too.
So my purpose in this blog is to share things I've learned over the years that have helped me have a healthier household, as naturally as possible. Because while I love to share things with others- it takes time. I have three little kids and not an immense amount of time for my personal infomercials.
So- this blog will build slowly but surely. If you have questions about anything- feel free to ask. Just know I may or may not have the answer.
If you want the tons of research behind any given subject- you're going to have to look for that yourself. (It's that whole time thing :)
Oh- and I think there are different levels of healthy and naturalness. That's great. I may not be where you are- you may not be where I am. Even better. But let's respect each other and leave the bashing at the door. Thanks!
Subscribe to:
Comments (Atom)